802Projects
I purchased a 93 vr4 that had fog light issues. The passenger fog light was pitted really bad and the drivers fog light was cracked open and covered with plastic tape. I was able to find someone selling 3 fog lights online (1 set and 1 drivers side). So with my solo fog light this gave me two full sets to work with.
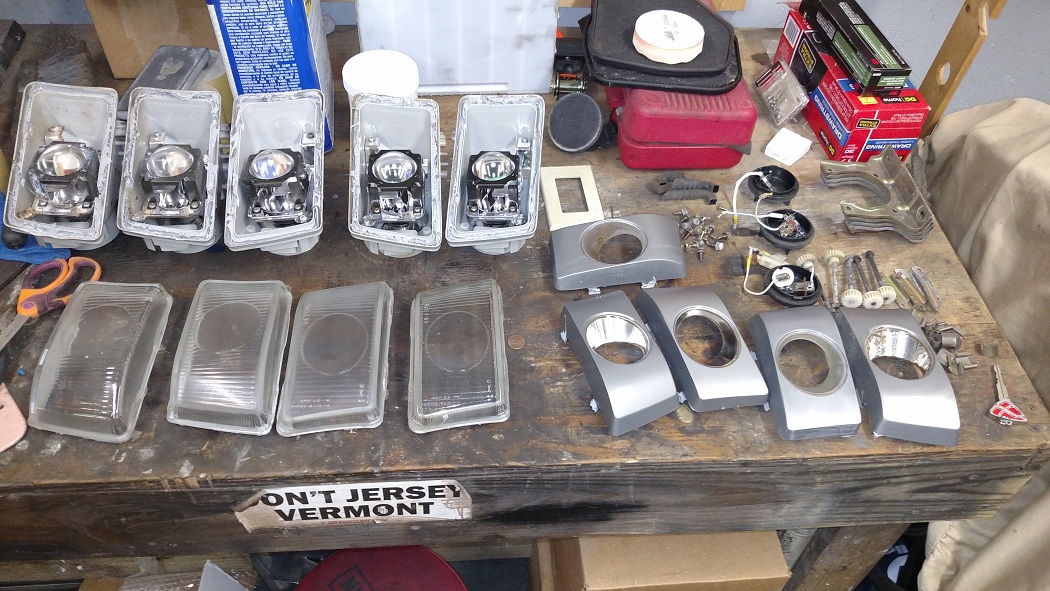
The first thing I did was clean the assemblies using a tooth brush and soapy water. Then I took off all the external parts. I removed the brackets, bulbs, adjusters, clips etc...
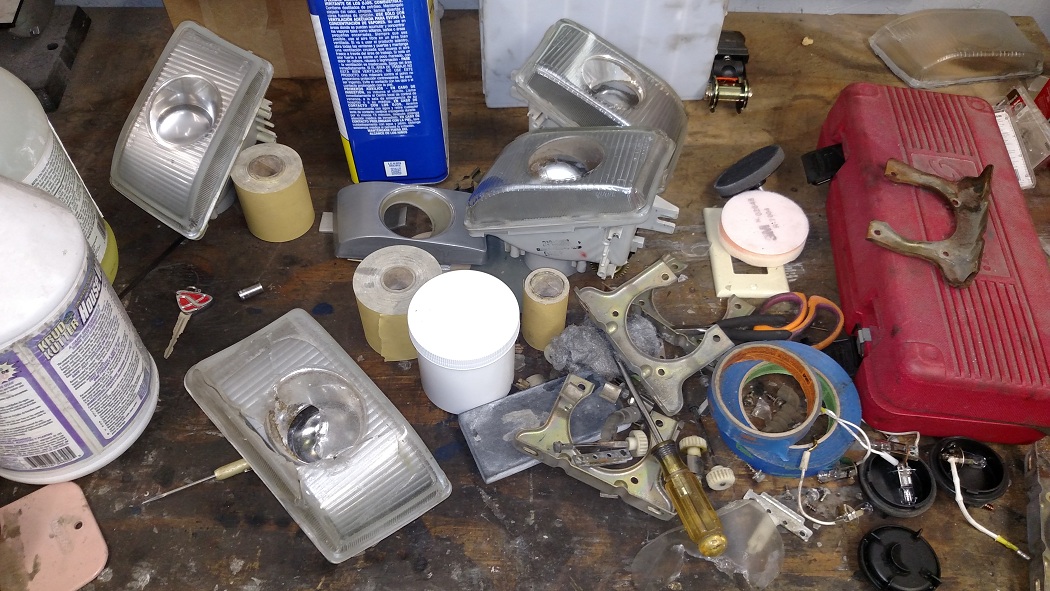
Next thing I did was open them all up. To do this you can bake them in the oven. I baked them one at a time for 12 minutes at 220 degrees. After removing them I was able to carefully pry the edge of the lens up and pry them apart by hand. (wear gloves)
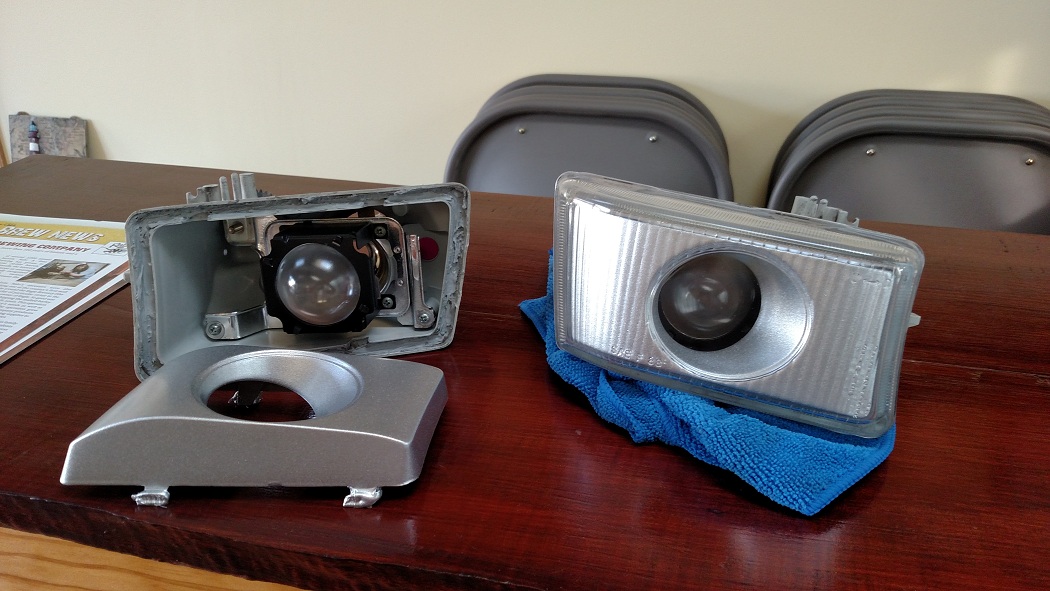
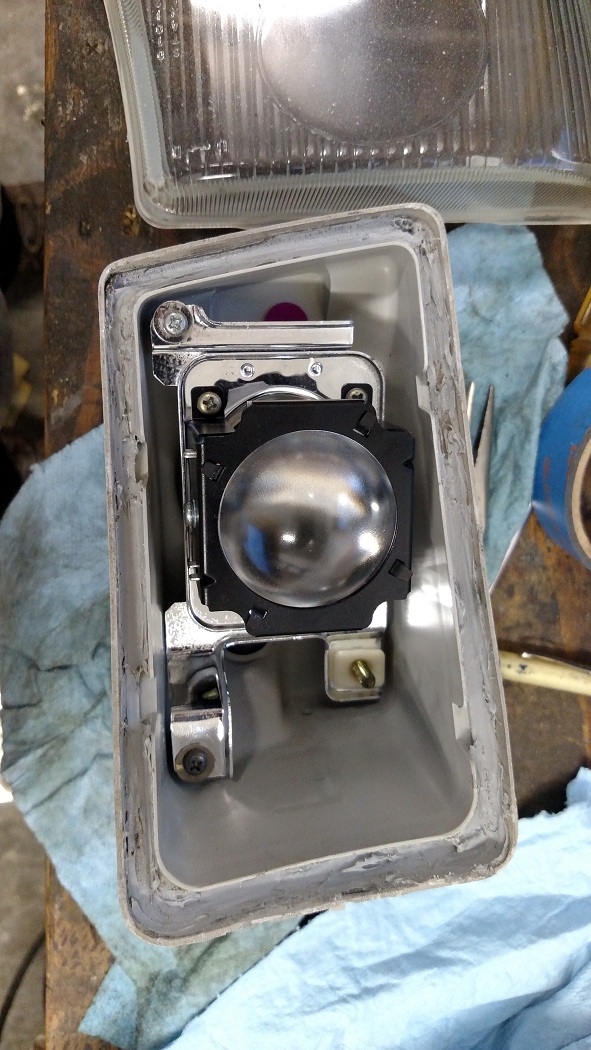
Here is a shot at the inside of the shroud. The oem shrouds are painted silver and the center lens area is painted chrome. The chrome paint flakes off though as seen in pics.
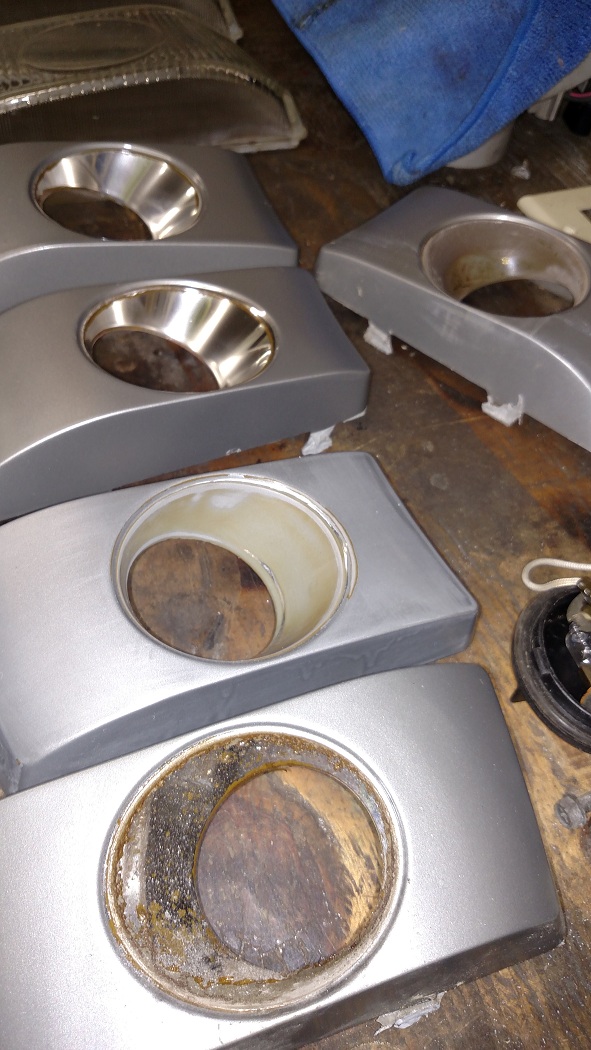
With the shrouds removed, you can then unscrew the lens housings. You can see the metal bracket that hold the housings are also oxidized.

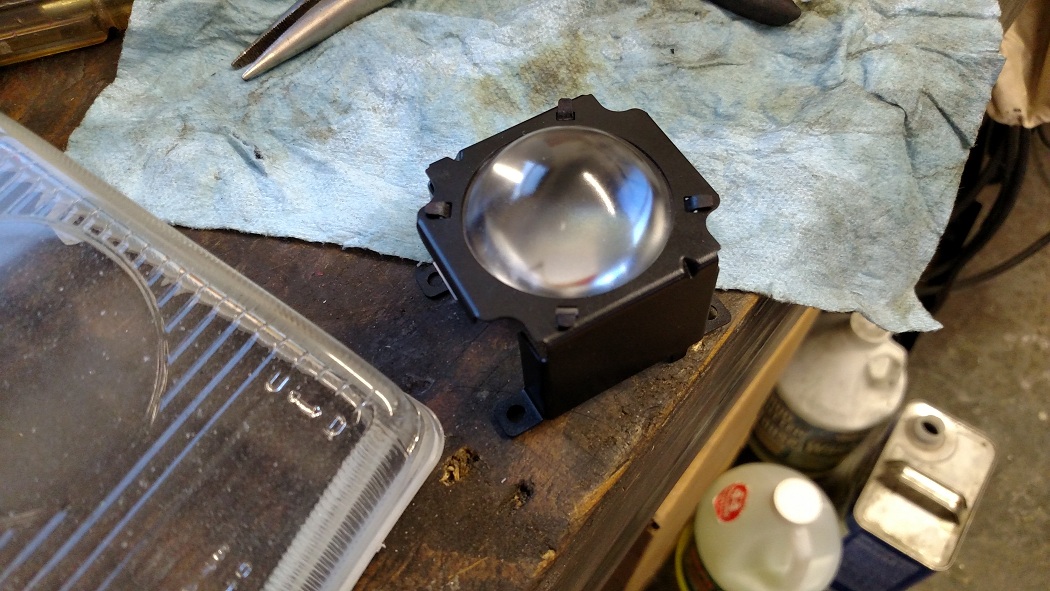
I cleaned up the metal brackets and sprayed them with some Dupli-Color Matte black caliper paint I had from another left over project. Once dry I reinstalled the lens. The lens is held in with a metal ring bracket that has 4 little tabs that bend.
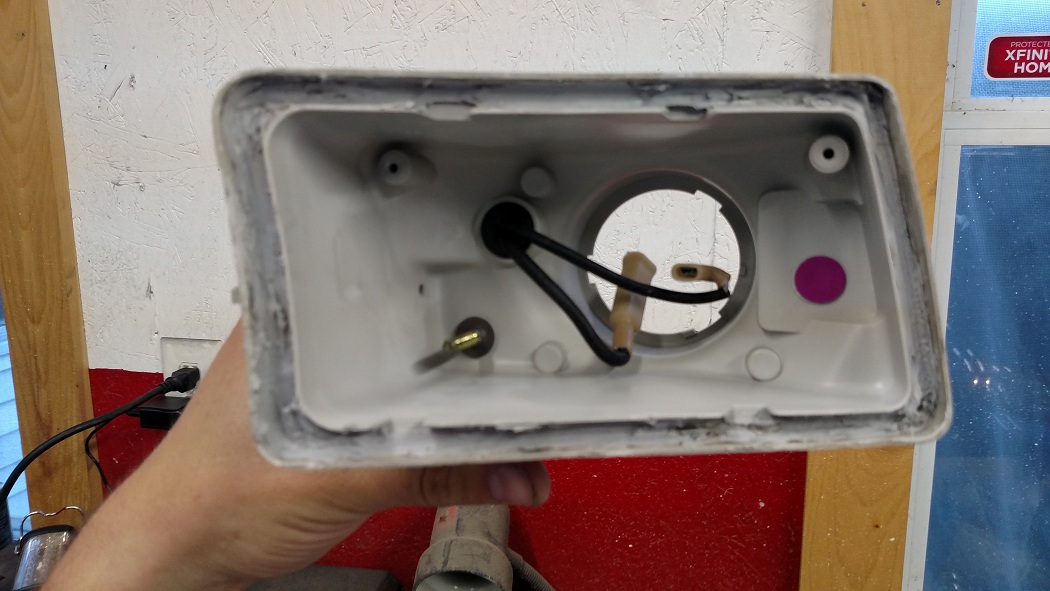
With everything removed from the plastic housing I cleaned it up with some soapy water and a tooth brush. I cleaned out the grooved area around the edges where the sealant goes with a heat gun and a regular screwdriver. I heated up the screw driver tip with the heat gun then dug out the butyl sealant the best I could. I didn't bother making it perfect. I was more or less making room for new butyl sealant.
I sanded all of the pealing chrome off the shrouds and scuffed up the painting area. I used 320 grit sandpaper to do this. Afterwards I sprayed everything with about 5-6 thin coats of silver spray paint with build in primer I got from Lowes.

Here is a pic with the lens assembly mounted back into the clean housing.
Now the hardest part; the glass lens... Now I've polished dozens of plastic lights before using the 3m kit. But glass is a lot harder to do than plastic. It takes about 10 times longer to sand down. I started with 80 grit sandpaper on an orbital palm sander. It took a while to get rid of all the stone marks. Every minute or so I'd have to stop and take a break as the glass would get very hot. Initially I kept using the orbital sander down to 500 grit, but I found that didn't work very well. It was difficult to tell the finer grit swirls from the deeper ones from the previous grit. So instead I hand sanded them. With 100 grit I went in one direction. Then I went to 180 grit and went the opposite direction. Then 240, 320, 400, 500. Each step took easily 15-20 minutes. Glass does not sand easy like plastic lens. When I got to 500 grit I used a spray bottle to wet sand the lights. Afterwards I tried using some 800 grit, but it was too big of a step. After about 20 minutes of sanding I was making no progress in the glass. SO really 500 grit is as much as I went.
Now at this step the lens is very hazy. You can also visually see the 500 grit sanding marks. When you sand plastic lenses using the 3m kit you go down 3000 grit. I was not feeling too confident at this point that it would work. I started polishing the headlights with the Cerium Oxide glass polishing compound. I bought 8 oz of it off amazon for ~ $12. It comes in a powder and I had to apply water to it to get it to a paste consistency. I didn't mix up the whole batch, just a little bit at a time. I spread the paste out on the glass and started buffing it with a foam pad (the one that came with a 3m headlight restore kit). When the compound would dry up I'd spray some water on it and keep polishing. Initially you don't see results. It will just look slightly less hazy. I kept applying compound though and repeated this process about 10 times. Afterwards the glass was clear like it should be.
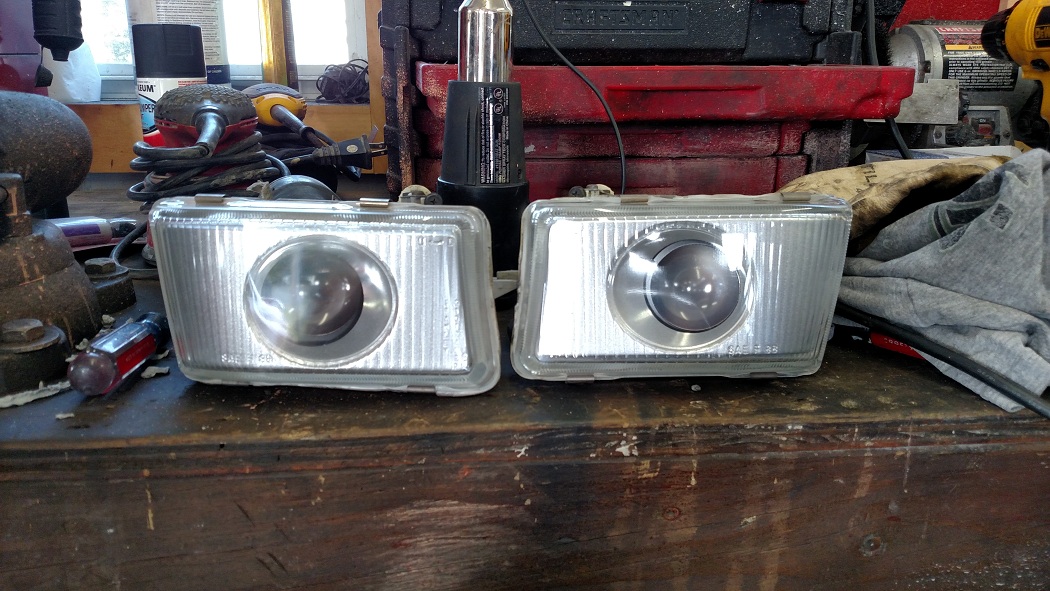
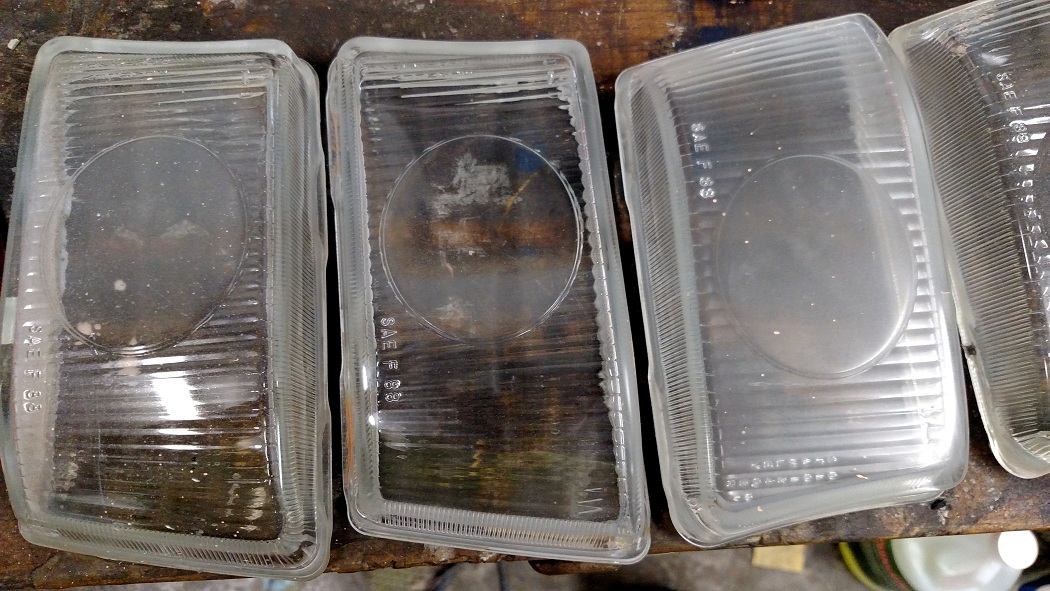
The lens on the far left is untouched. The lens in the middle is one I wet sanded and just polished with the cerium oxide. The lens on the right is one I've sanded down to 500 grit but I haven't polished yet. The little specs you see is actually splatter from my polishing the one in the middle.
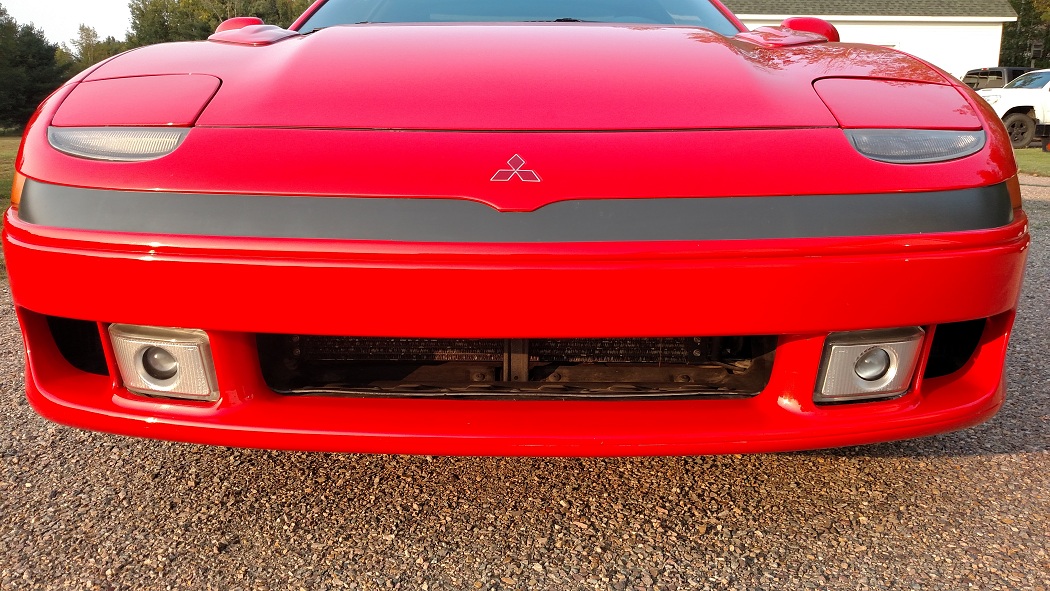
When the glass is polished its re-assembly time. I applied new sealant in the groove. I used RetroRubber Grey butyl sealant. It comes in a small roll and is about $23 on Amazon. Then I pressed the shroud back on into the sealant. I had to press it kind of hard as the sealant was room temperature. Then I set the glass on top and I stuck it back in the oven for 12 minutes at 220. Afterwards I pressed the glass fully on. I used a welding glove on each hand and muscled it together. Once it cools, reinstall the hardware and put them back on the car. I still need to adjust the aim of mine.