802Projects
Realistically I do not need an intercooler sprayer. I don't track the car or beat on it. I think I only put 400 miles on it last year. But I'm at the point where I'm running out of things to modify on it, and this seemed like a fun project. Plus the 2.5RS has a lot of dummy switch plugs. There are 3 next to the fog light button and 2 on the center console. Having so many blank spots kind of makes the car feel like a base model. The DCCD switches took care of the center console. Now with this modification I'll be able to fill up 2 more spots.
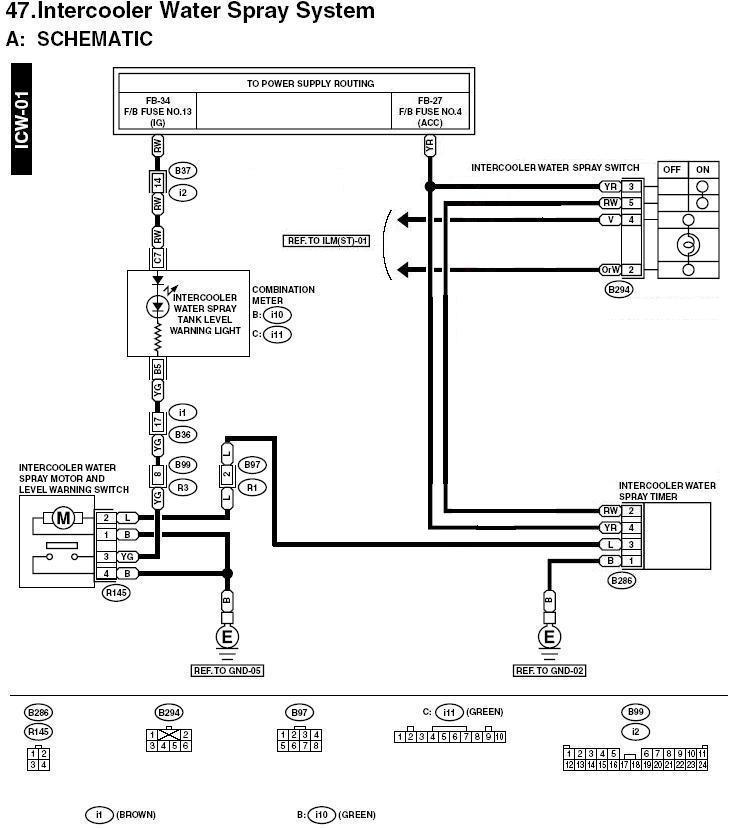
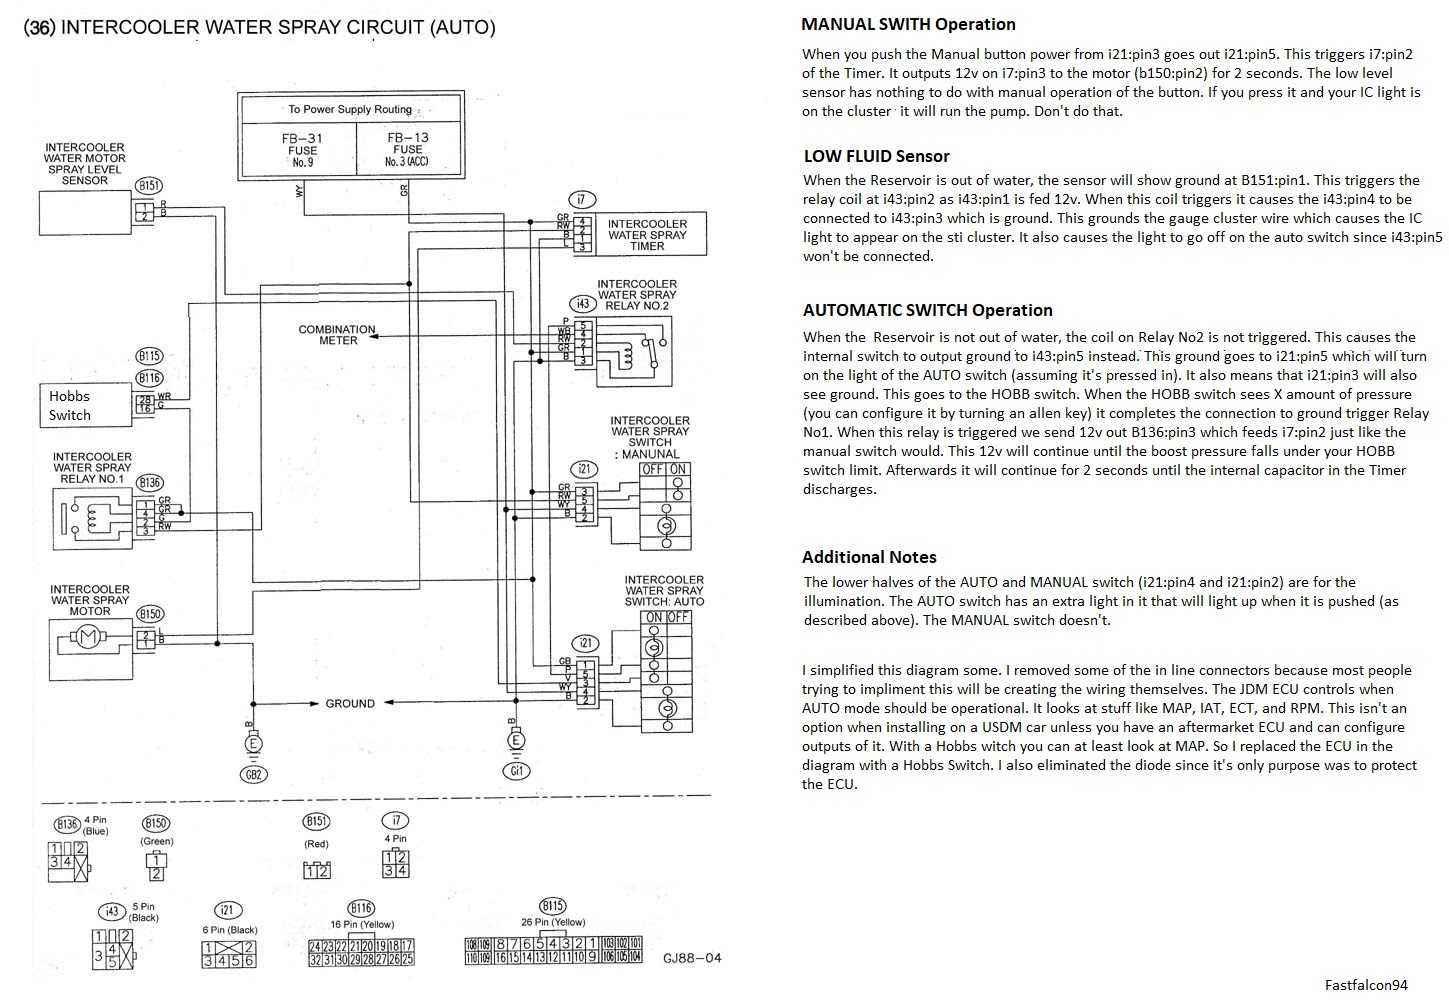
The 2004-2007 USDM STI comes with a very simple Sprayer system. It is a manual momentary switch and a Timer. Meaning you press it and it will spray water on the intercooler for 2 seconds. If you held the button in, it would continue spraying until 2 seconds after you release it.The tank is in the trunk and there is a low water sensor that can trigger a light on the gauge cluster. There is no safety built in aside from the light. If you press the button and ignore the light on the cluster; it will run the pump even if the tank is empty. This is what the wiring looks like:
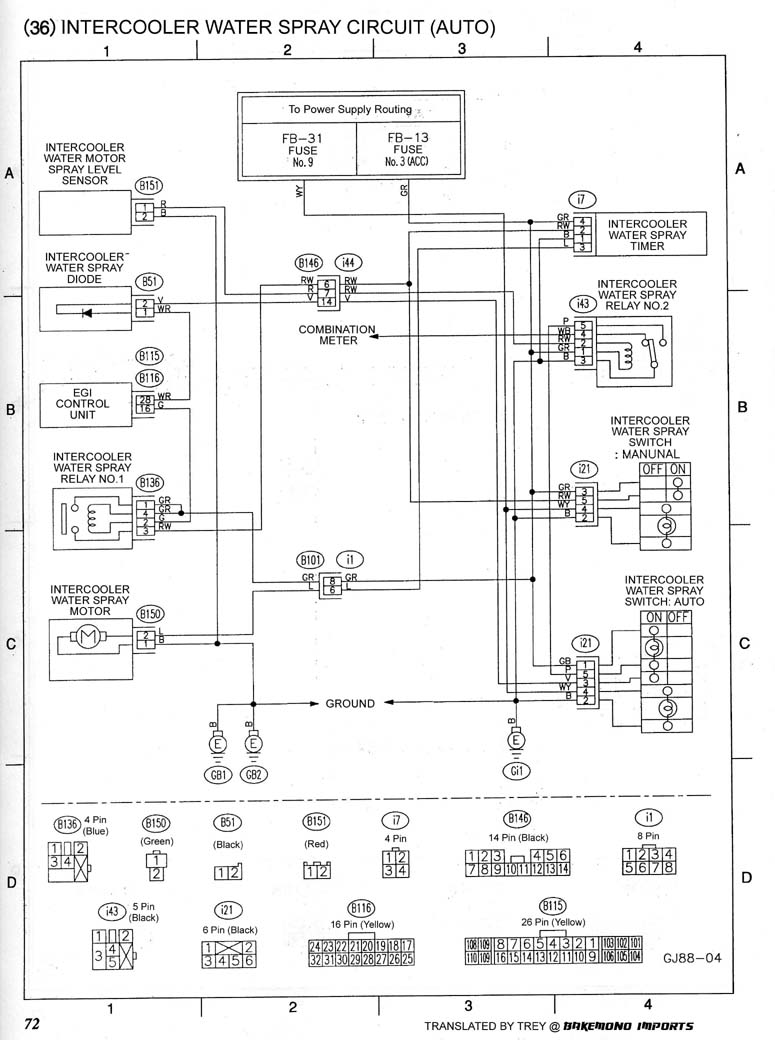
The JDM cars got a more advanced system. In addition to the manual switch they also contained an Auto switch that would communicate with the ECU. The Auto switch will stay depressed and depending on manifold pressure, coolant temp, intake air temp, and RPM; it will automatically spray. If the tank runs out of fluid, it will stop spraying and trigger the same low fluid light on the cluster. This is what the wiring looks like:
Since I have a USDM swap, my ECU doesn't have the ability to output a signal based on MAP, ECT, IAT, and RPM. However I can use a HOBBS switch to trigger AUTO mode based on boost. A HOBBS switch is an pressure switch that will provide continuity across 2 pins at a certain PSI. This is the diagram I mocked up. It's very similar to the JDM design only I replace the ECU with the HOBBS switch. I can also eliminate the DIODE as it was only present to protect the now non-existent ECU:
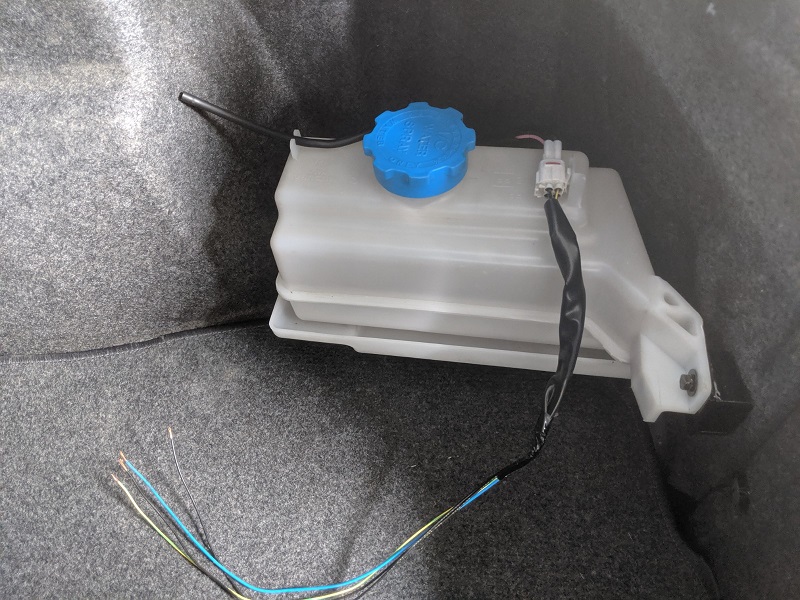
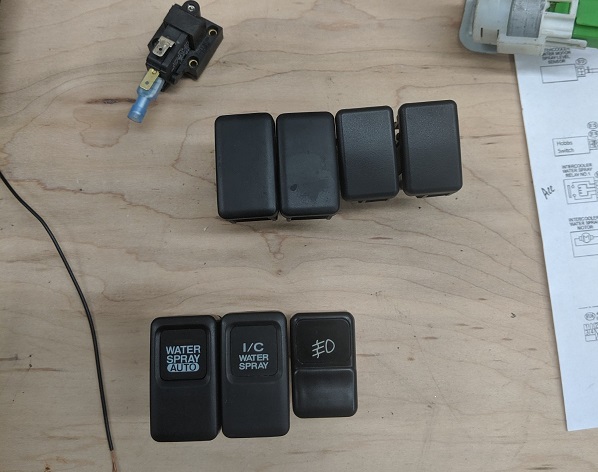
You'll need a few other supplies too like electrical tape, heat shrink tube, solder etc... Also if you have a GD dash you will want buttons for a GD dash. Those will be a lot easier to find than the GC buttons (which are no longer available through Subaru). If any of your bulbs are dead in your switches, you can get replacements off Amazon. A pack of 10 is around $7 (CEC Industries 7219 Bulbs). I also welded metal tabs to my trunk to install the tank. You could probably find another way to secure it if you didn't want to do that. I have a piece of plywood covering the spare tire area that I cut using the oem fiberboard as a template. I thought about cutting a new piece of plywood and extending it over on the passenger side so that I could just mount the tank to that instead. For the fittings I ordered a 30 pack off Amazon from BingSnow. It came with 10 Y fittings, 10 T fittings, and 10 Straight fittings. Technically you only need 1 T fitting up front, but I used a straight fitting in the back like the OEM systems have. That way if I ever have to remove the tank I'll keep a section of hose attached to it that I can keep above the tank and not spill water everywhere. Plus the less you have to shove/remove a hose from the plastic nipple on the pump motor, the less likely you are to break it.
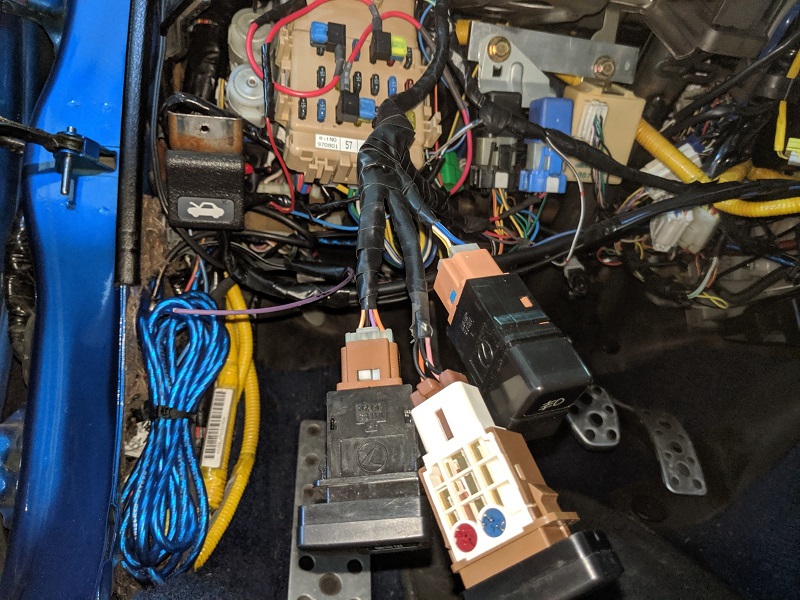
I wired everything up on the workbench to test the circuit. I used an oem 5 pin relay and a 4 pin relay that I had left over from my harness merge, but you could just buy some aftermarket ones from a parts store. It works just like it should. Here's a video of the wire test explaining everything:
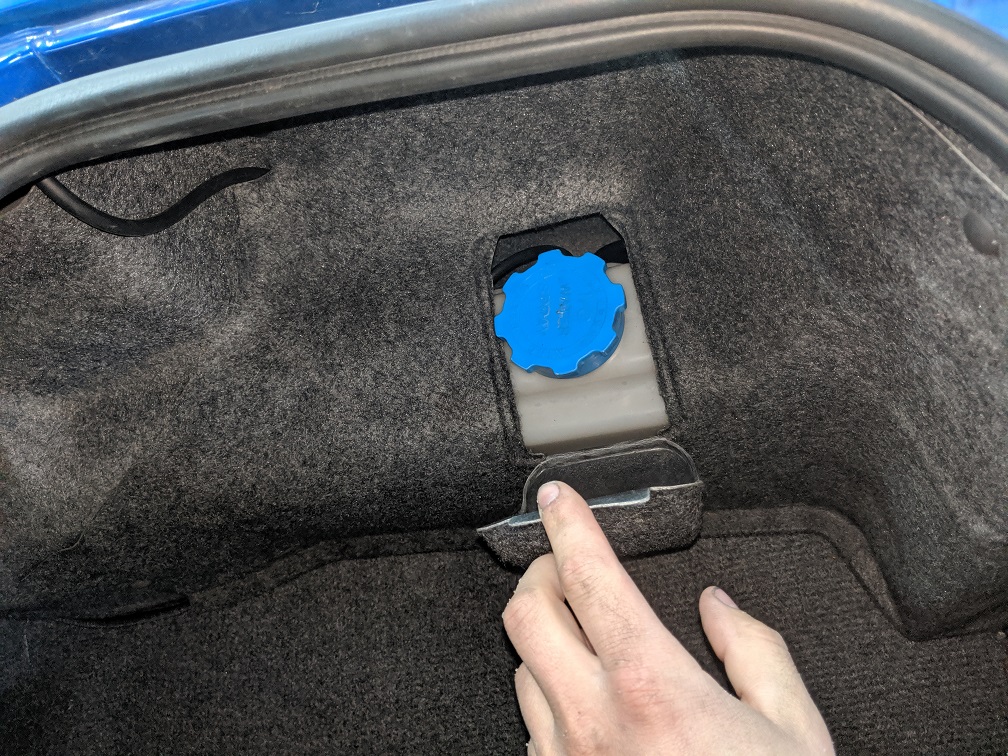
I was able to mock up some brackets in the trunk for the tank to bolt to. My friend welded them in. I applied a little bit of seam sealer around them and painted them to prevent rust.
I had to cut the carpet to fit around the mounting tabs. I think this looks OEM enough.

Here it is all bolted in. I just drilled and tapped 2 holes for 10mm bolts.
I spent a lot of time wiring it in because I wanted it to look clean. After removing it from the test bench I made sure to label everything clearly so I knew where every wire went. I know it can get confusing looking at a plug and wondering if the wire you want is the upper left one looking at it from the front of connector or the back of the connector. I've played that game before and I know it would get even more confusing trying to make sense of it upside down and rotated under a dash. It's kind of like my cell phone charger. There are only 2 possible ways it could possibly plug in and it still takes me 3 tries. I was able to mount the 2 relays and the timer underneath the steering column area. I had to space it over using a spare piece of aluminum.
I ran into a problem trying to mount the switches. I was under the assumption that the sprayer switches I have (from an 04-07 GD STI) would fit in the GC button openings. Unfortunately that is not the case. The GD buttons are taller and will not fit a GC dash. I was able to track down some GC buttons on eBay UK, I'm just waiting on them to come in.
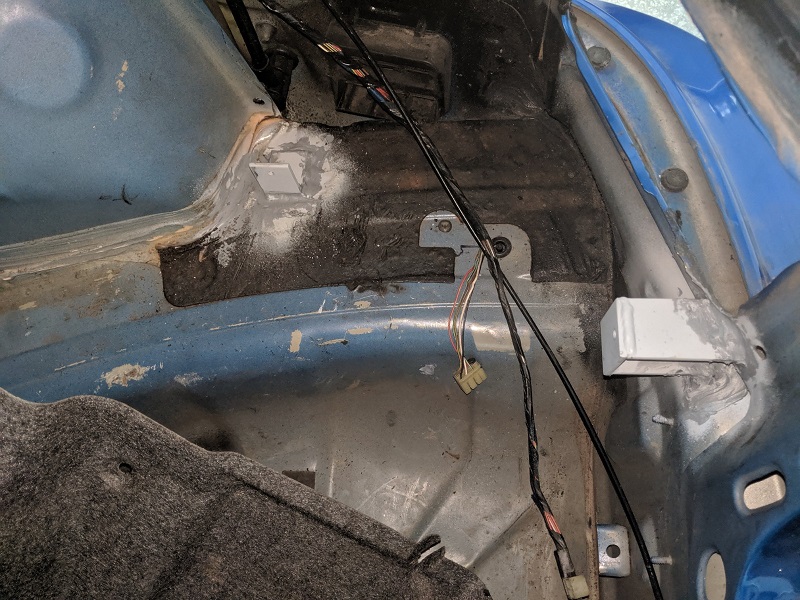
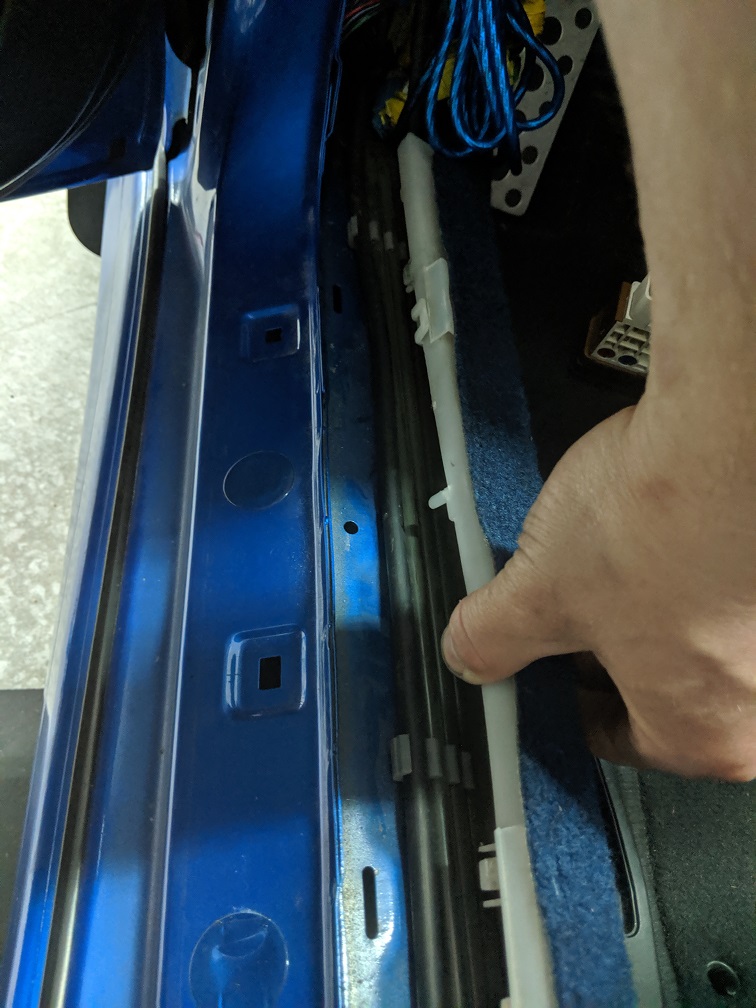
For the hose I went with Gates 27042 Windshield hose. It's nice and thick and comes in a 50' roll which is plenty. I used an existing plug in my firewall that is towards the center of the car below the top mount intercooler area. I removed the plug, drilled a hole in it, then cleaned up the edges with a hot nail. (When you drill through rubber it never leaves a clean hole. Using a torch on a nail and then sticking it through the drill hole cleans it up.) I routed the hose above the pedals, then down the drivers side door sill area where the brake lines are. The plastic clips Subaru used to hold the brake lines in are perfect. There is a free channel right on the outside for you to tuck the line in. It is a tight fit and if you shove the hose in it's going to pinch the line. I grabbed the plastic and was able to spread/stretch it open more first. The line fit snow with no added pressure. I sent it into the trunk area then zip tied it under the rear deck lid to move it over to the passenger side.
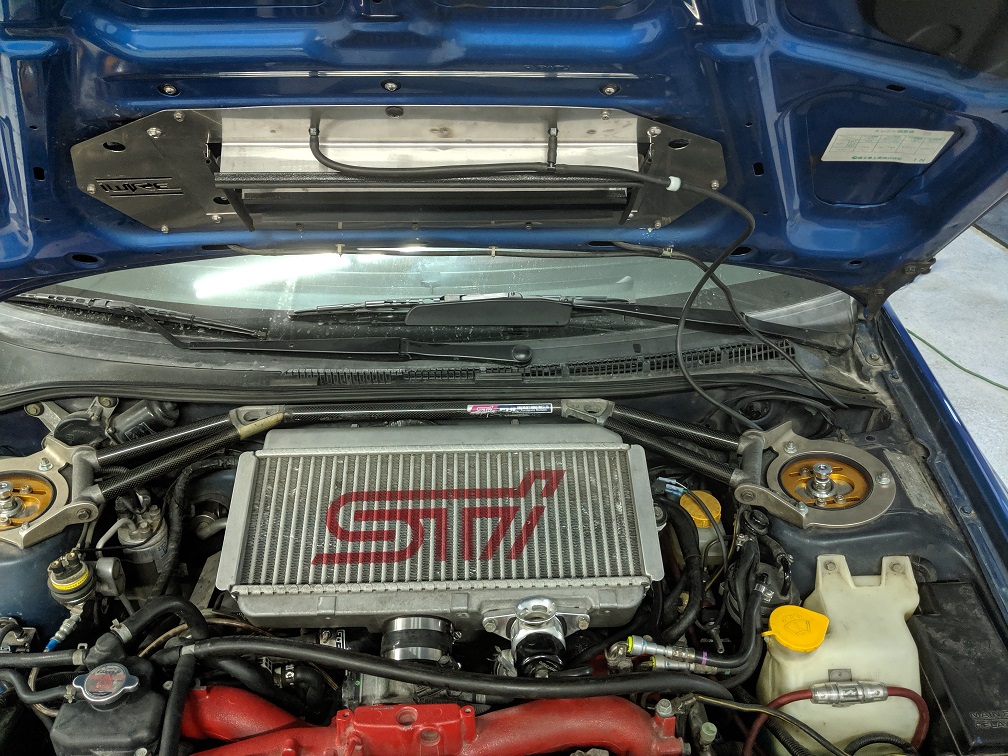
Here is how the hose looks under the hood. This is the iWire intercooler shroud. It fits really well. Notice there is also an OEM check valve I added. I plan on buying some zip tie snaps so I can secure the hose to the underside of the hood. There are already some factory holes I can use.
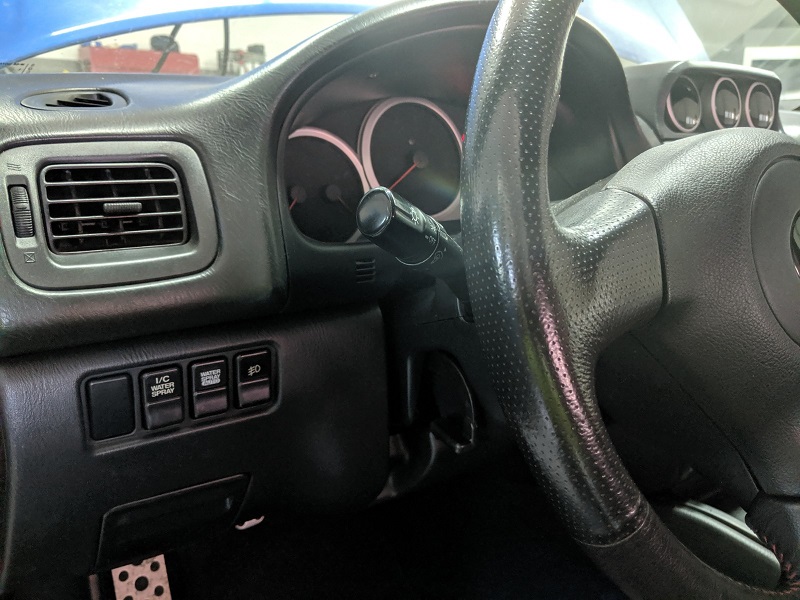
My switches finally came in. Everything seems to work perfect. I love the way the buttons look next to the steering wheel. Overall this was a fun project. I'm glad it worked out well.
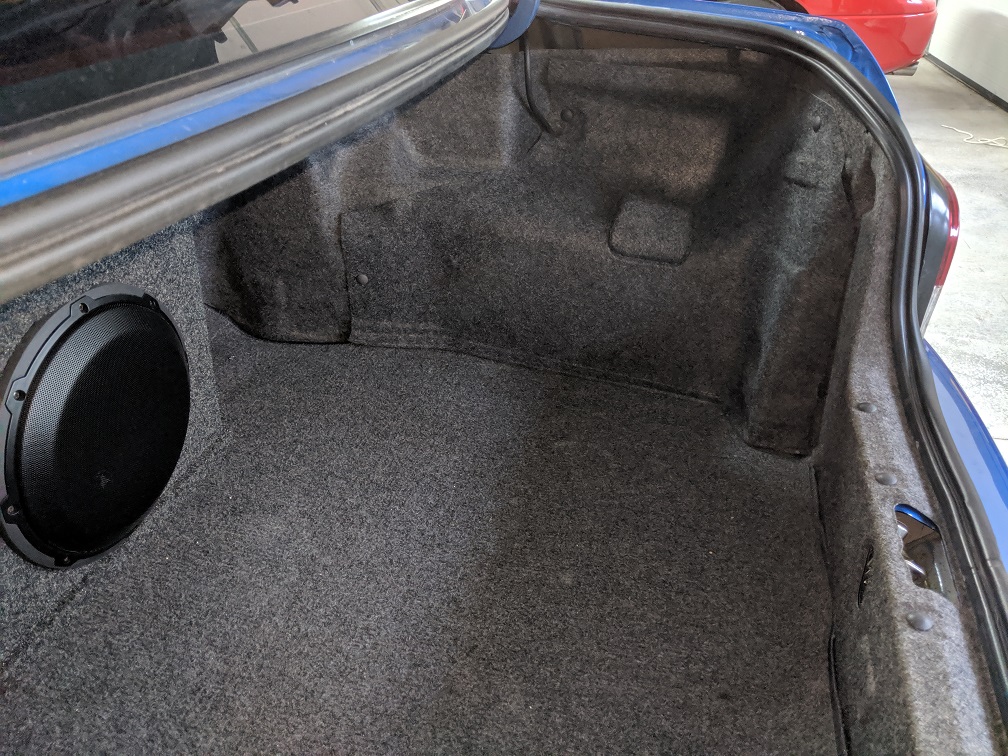
I took it a step further. I parted out a 2004 sti and decided to see what I could do with the rear passenger trunk carpet in my GC. I went into it thinking it wouldn't work and worst case I'm out 30 minutes of my time. I didn't measure anything, I just eyeballed it, cut it, test fit it and repeat. Even after I got it to semi-fit, there were some gaps on the edges. Fortunately the trunk carpet has a plastic backing. I used a heat gun and I was able to make some bends to get it to contour better. I was able to use 2 of the oem GC carpet mounting spots to tie it in. Then I drilled 1 hole in the front and back and used an oem clip to really clamp the edges together. It's not flawless but I think this looks 100x better than just seeing the tank.